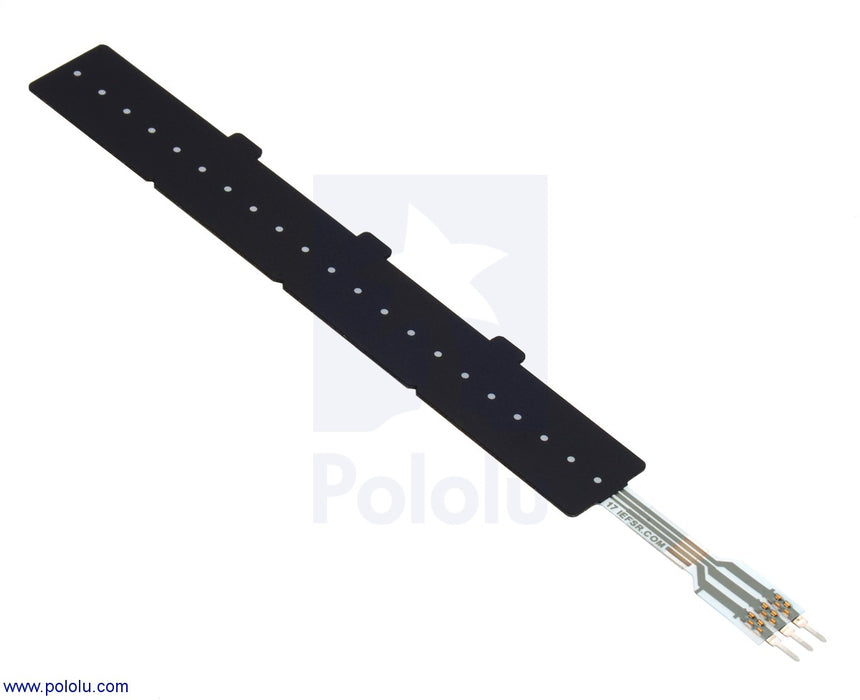
Force-Sensing Linear Potentiometer: 4.0″×0.4″ Strip, Customizable Length
Tutti i prezzi sono IVA inclusa
Force-sensing linear potentiometers (FSLPs) from Interlink Electronics are passive components with resistances that depend on the magnitude and location of the force applied to the strip, making it easy to add novel touch interfaces or tactile sensors to your project. This 4″ (10 cm) strip can be cut to shorter, predefined lengths (1″, 2″, or 3″) to better suit your application. An external resistor (typically 4.7 kΩ to 10 kΩ) is required but not included
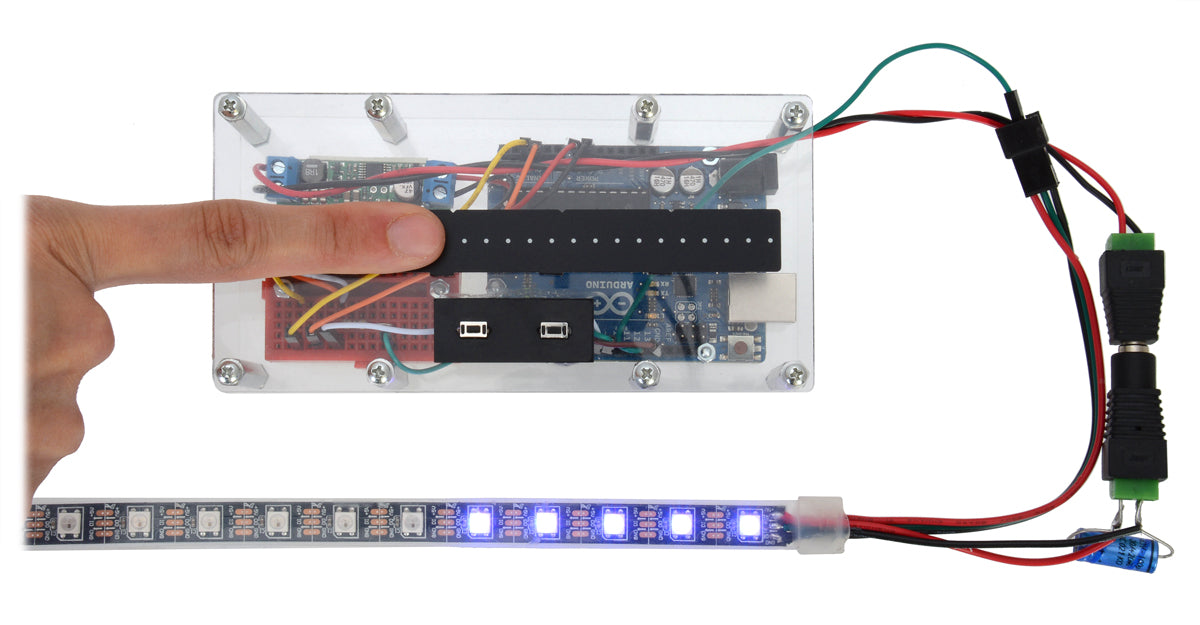
This force-sensing linear potentiometer (FSLP) from Interlink Electronics is a passive component with internal resistances that independently change in response to the location and magnitude of an applied force. This allows a microcontroller with an analog-to-digital converter (ADC), such as an Arduino or A-Star, to easily determine where and how hard the strip is being pressed, enabling advanced touch-control user interfaces (like menu navigation) or sophisticated tactile sensors. The FSLP is effectively a force-sensing resistor (FSR) that can also simultaneously sense position. The video above shows a sample project with this FSLP being used to control an LED strip: position determines the number of lit LEDs and pressure determines the LED color. The Arduino code used in the example is available on github, and it has functions for reading pressure and position that could be helpful in getting started using this sensor. More information about the demo is available in our FSLP blog post.
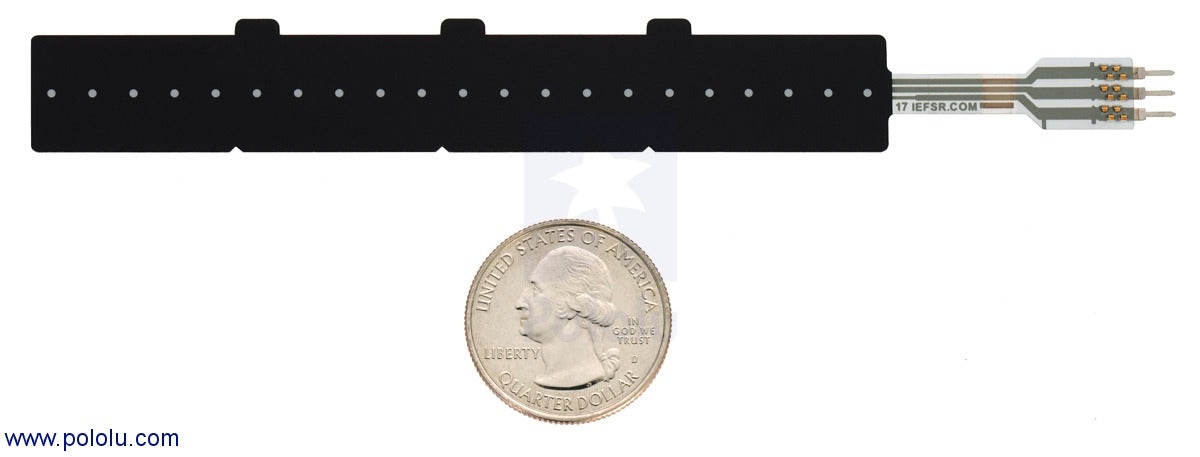
The 4.1″ × 0.57″ strip is light (1.4 g) and extremely thin (0.02″), and it has an active sensing area of 3.9″ × 0.37″ that can be customized to several different lengths by cutting the strip at predefined points. It does not appreciably compress when pressure is applied, and while it is flexible, it is intended to be used on smooth, flat surfaces since bending can negatively impact performance. The FSLP has a masked adhesive backing for easy mounting, and the 1.2″ flat, flexible male leads give you a convenient way to integrate the part into your project. The two male pins (called “solder tabs”) have a 0.1″ spacing, which means they are compatible with most solderless breadboards and perfboards, though the solder tabs are too short to work well with many 0.1″ connectors.
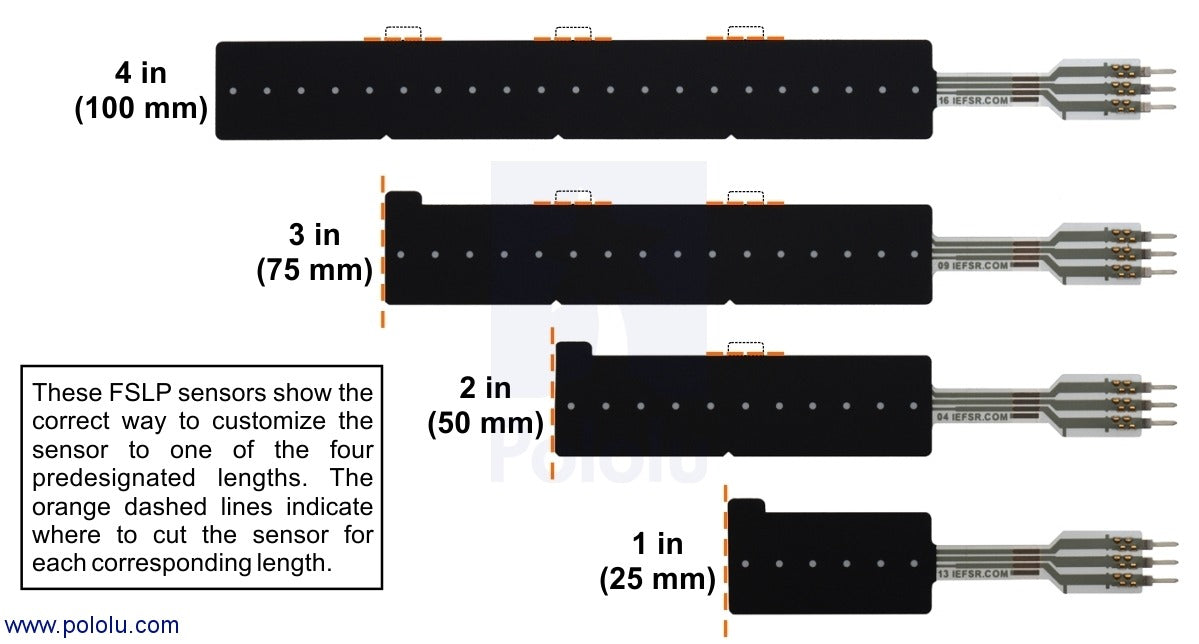
Note: In order to get the full 4″ (10 cm) range of the strip, you must cut off the three small tabs along the edge of the strip. These tabs determine the active length of the strip, and with all three tabs intact, only the first inch of the sensor will provide position readings. See the Customizing the strip length section below for more information.
Note that this FSLP is not a load cell or strain gauge, and it is not suitable for precision force or pressure measurements. While it can be used for high-resolution dynamic measurements, only qualitative force readings are generally attainable.
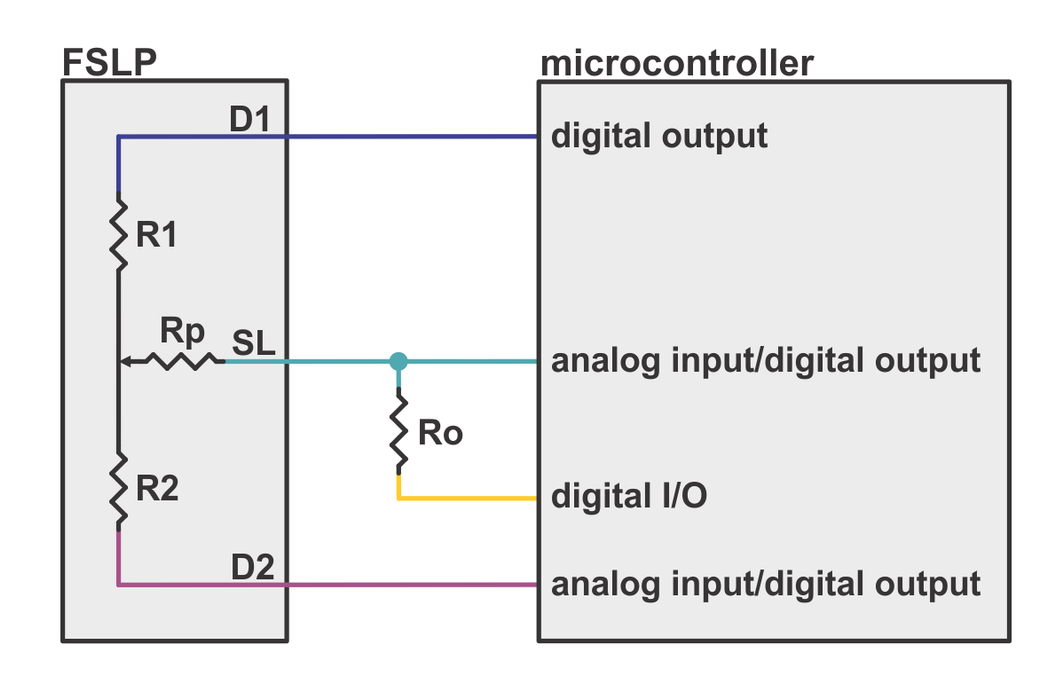
The FSLP is a three-terminal device, and when pressure is applied, its internal circuit is equivalent to three resistors. Reading the magnitude of the pressure requires an external resistor be added to the circuit, so a total of four microcontroller lines are required, two of which must be capable of reading analog voltages. Detailed information about this FSLP, including theory of operation, dimensions, and measurement procedures, is available in the FSLP integration guide (513k pdf). The rest of this section briefly summarizes some of the key points of the measurement procedures listed in the integration guide.
Measuring pressure
The resistance Rp depends directly on the magnitude of the of applied pressure, changing from around 300 kΩ at very light touches to around 1 kΩ when pressing very hard. If the pin connected to D1 is driven high and pin connected to the bottom of resistor Ro is driven low, the SL pin becomes the output of a resistive voltage divider with Rp on top and the external resistor Ro on the bottom. Measuring the voltage at terminal D2 gives the input voltage to this pressure-dependent voltage divider and allows the pressure measurement to be made independent of R1 and R2, which change depending on where the strip is being touched. Once you have measured the voltage divider input (D2 voltage) and output (SL voltage), you have everything you need to compute Rp, which is directly related to the pressure.
The optimal value for Ro depends on the specific application, but a value between 4.7 kΩ and 10 kΩ should work fine for most projects.
Note that when no pressure is applied to the strip, Rp should be many megaohms and the voltage at SL will be pulled almost completely to zero through Ro. You can use this to determine when the strip is not being touched.
Measuring position
The strip also functions as a linear potentiometer, with the applied pressure (e.g. your finger) acting as the wiper. As the point of applied pressure moves from one side of the strip to the other, R1 will get smaller and R2 will get bigger, or vice versa (the sum of R1 and R2 is typically around 1 kΩ to 1.5 kΩ per inch of the strip). If the pin connected to D1 is driven high and the pin connected to D2 is driven low, the SL pin becomes the output of this linear potentiometer (the pin connected to the bottom of Ro should be set as a high-impedance input to effectively remove Ro from the circuit). The voltage on the SL pin should range from 0 to Vcc (logic low to logic high) as the pressure application point moves from one extreme to the other.
Note that when no pressure is applied to the strip, the SL pin is essentially floating and will provide no meaningful position measurement. As described in the previous section, you can use the pressure reading to determine when the strip is not being touched so that you know when to ignore the position measurement.
This sensor has high-impedance outputs, which can be difficult to accurately measure using a microcontroller’s ADC. The full measurement procedures in section 5 of the FSLP integration guide (513k pdf) have some helpful techniques for reducing noise and improving accuracy.
As the above diagram shows, this FSLP can be used as a full 4″ strip, or it can be cut to shorter, predesignated lengths. The small tabs along the top edge of the strip determine the active length of the sensor. The strip ships with all four tabs present, which makes the default active length the 1″ segment closest to the leads. To get the active area to span the full 4″, all three edge tabs must be cut off. See the FSLP customization guide (1MB pdf) for more information.
If you want a better understanding of what you are cutting, the picture below shows the FSLP with the top ink layer removed, revealing the internal conductor layer.
File downloads
- FSLP integration guide (513k pdf)
- Detailed information about Interlink Electronic’s FSLP force-sensing linear potentiometers, including theory of operation, performance data, circuit diagrams, and usage tips.
- FSLP 10cm customization guide (1MB pdf)
- The base version of the 10 cm FSLP sensor ships in a non-functional state. Depending on the application, the base sensor can be customized to yield four different active length options as shown in this customization guide.
Recommended links
- Force-Sensing Linear Potentiometer and LED Strip with Arduino Demo
- This Arduino program (sketch) shows how to use an Interlink force-sensing linear potentiometer to control anaddressable RGB LED strip.

